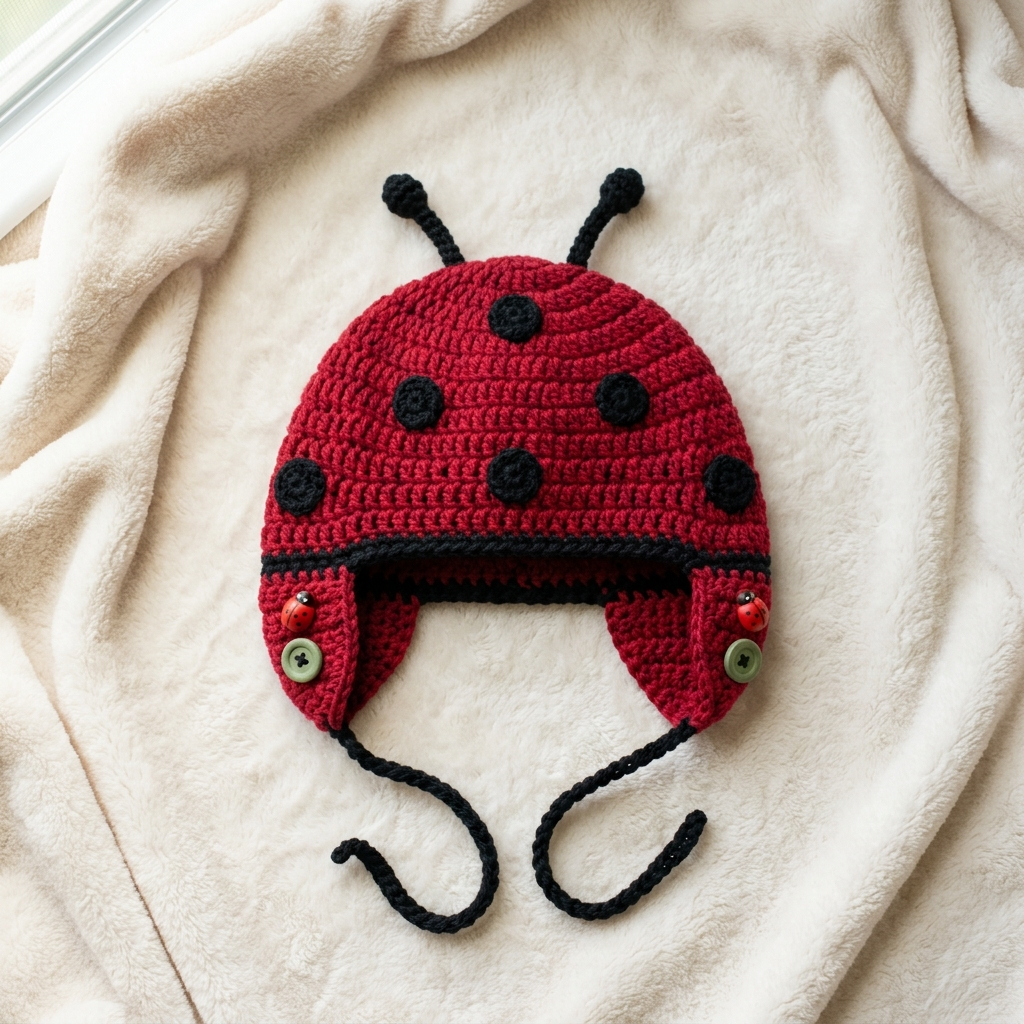
This cheerful red and black ladybug bonnet with earflaps, antennae, and braided ties is the perfect first project for beginner crocheters wanting to make something special for a little one. The pattern uses basic half double crochet stitches throughout, with simple appliqué spots and easy-to-make antennae. Let’s get started.
Materials You Will Need
- Yarn: Worsted weight (4) acrylic yarn
– Red: approximately 80 yards
– Black: approximately 40 yards
- Hook: 5.0mm (H/8)
- Notions: Yarn needle, stitch marker, 2 decorative buttons (optional, for earflaps), 2 small ladybug buttons (optional)
- Finished size: 0 to 6 months (approximately 14 to 15 inch circumference)
Gauge
14 hdc and 10 rows = 4 inches in half double crochet
Abbreviations
- ch = chain
- hdc = half double crochet
- sc = single crochet
- sl st = slip stitch
- st(s) = stitch(es)
- inc = 2 hdc in same stitch
- rnd = round
The Hat Crown
Work in continuous rounds. Use a stitch marker to track round beginnings.
Rnd 1: With red, magic ring, 8 hdc in ring. (8 sts)
Rnd 2: Inc in each st around. (16 sts)
Rnd 3: Hdc 1, inc repeat around. (24 sts)
Rnd 4: Hdc 2, inc repeat around. (32 sts)
Rnd 5: Hdc 3, inc repeat around. (40 sts)
Rnd 6: Hdc 4, inc repeat around. (48 sts)
Rnds 7 to 14: Hdc in each st around. (48 sts)
Rnd 15: Change to black. Sc in each st around. (48 sts)
Fasten off, leaving a long tail for weaving in.
Earflaps (Make 2)
The earflaps are worked flat in rows, then attached to the hat.
Row 1: With red, ch 11. Hdc in 2nd ch from hook and each ch across. (10 sts)
Row 2: Ch 1, turn. Hdc in each st across. (10 sts)
Row 3: Ch 1, turn. Skip first st, hdc in next 8 sts, skip last st. (8 sts)
Row 4: Ch 1, turn. Hdc in each st across. (8 sts)
Row 5: Ch 1, turn. Skip first st, hdc in next 6 sts, skip last st. (6 sts)
Row 6: Ch 1, turn. Hdc in each st across. (6 sts)
Fasten off, leaving a long tail.
Earflap Border
With black, join yarn at top corner of earflap. Sc evenly around the entire earflap, working 3 sc in each bottom corner to create a smooth curve. Sl st to join. Fasten off.
Attaching Earflaps
Position earflaps on either side of the hat, approximately 5 stitches apart at the back. The top edge of each earflap should sit just below the black border round. Whip stitch in place using matching yarn.
Black Spots (Make 6)
Rnd 1: With black, magic ring, 6 sc in ring. (6 sts)
Rnd 2: Inc in each st around. (12 sts)
Sl st to first st. Fasten off, leaving a tail for sewing.
Arrange spots randomly across the red crown of the hat, as shown in the image. Sew in place, weaving through the back loops to keep the front surface smooth.
Antennae (Make 2)
The antennae have two parts: a stem and a ball tip.
Stem
With black, ch 15. Sc in 2nd ch from hook and each ch across. (14 sts)
Fasten off, leaving a long tail.
Ball Tip
Rnd 1: With black, magic ring, 6 sc in ring. (6 sts)
Rnd 2: Inc in each st around. (12 sts)
Rnds 3 to 4: Sc in each st around. (12 sts)
Rnd 5: Sc2tog repeat around. (6 sts)
Stuff lightly with yarn scraps. Close opening with yarn needle.
Assembling Antennae
Sew the ball tip to one end of the stem. Attach the other end of the stem to the top of the hat crown, positioning both antennae about 1.5 inches apart at a slight outward angle. Secure firmly with several stitches.
Braided Ties
Cut 6 strands of black yarn, each approximately 24 inches long (3 strands per tie).
Fold strands in half and pull the folded loop through the bottom point of one earflap using your hook. Pull the loose ends through the loop and tighten to secure.
Divide the 6 strand ends into 3 groups of 2 strands each. Braid tightly for about 6 to 8 inches. Knot the end and trim evenly.
Repeat for the second earflap.
Optional Button Details
The featured hat shows decorative buttons on the earflaps. Sew a small green or coordinating button to each earflap, and add tiny ladybug buttons above them for extra charm. Ensure buttons are sewn on very securely if the hat is for a baby.
Tips for Success
- Tension matters. Keep your stitches consistent so the hat maintains its shape. The fabric should be firm enough to hold the antennae upright.
- Test the fit. Before adding all embellishments, try the hat on your little one (or a similar-sized ball or doll head) to check circumference.
- Secure all pieces. Babies grab everything. Double-stitch spots, antennae, and especially buttons.
- Weave in ends invisibly. Work tails through the wrong side of stitches, then reverse direction for extra security.
Size Adjustments
For 6 to 12 months, add one more increase round before the straight sides (Rnd 7: Hdc 5, inc for 56 sts), then work 9 straight rounds instead of 8. Add 2 more stitches to the earflap starting chain.
For toddler sizes, add two increase rounds and extend the body by 2 to 3 additional rounds.
Wrapping Up
This ladybug bonnet works up quickly and makes an irresistible gift or photo prop. The combination of bright red yarn, playful black spots, and quirky antennae captures that classic ladybug look perfectly. Grab your hook and get started on this sweet little project today.
Related Articles
- DIY Crochet Jewelry Set: Matching Earrings, Necklace & Bracelet
- Adorable Granny Square Baby Cardigan Pattern for Beginners
- DIY Crochet Flower Necklace & Earrings Set with Pearl Centers
- Adorable Crochet Lion Amigurumi Pattern for Beginners & Beyond
- Adorable Rainbow Amigurumi Bunny Pattern for Beginners