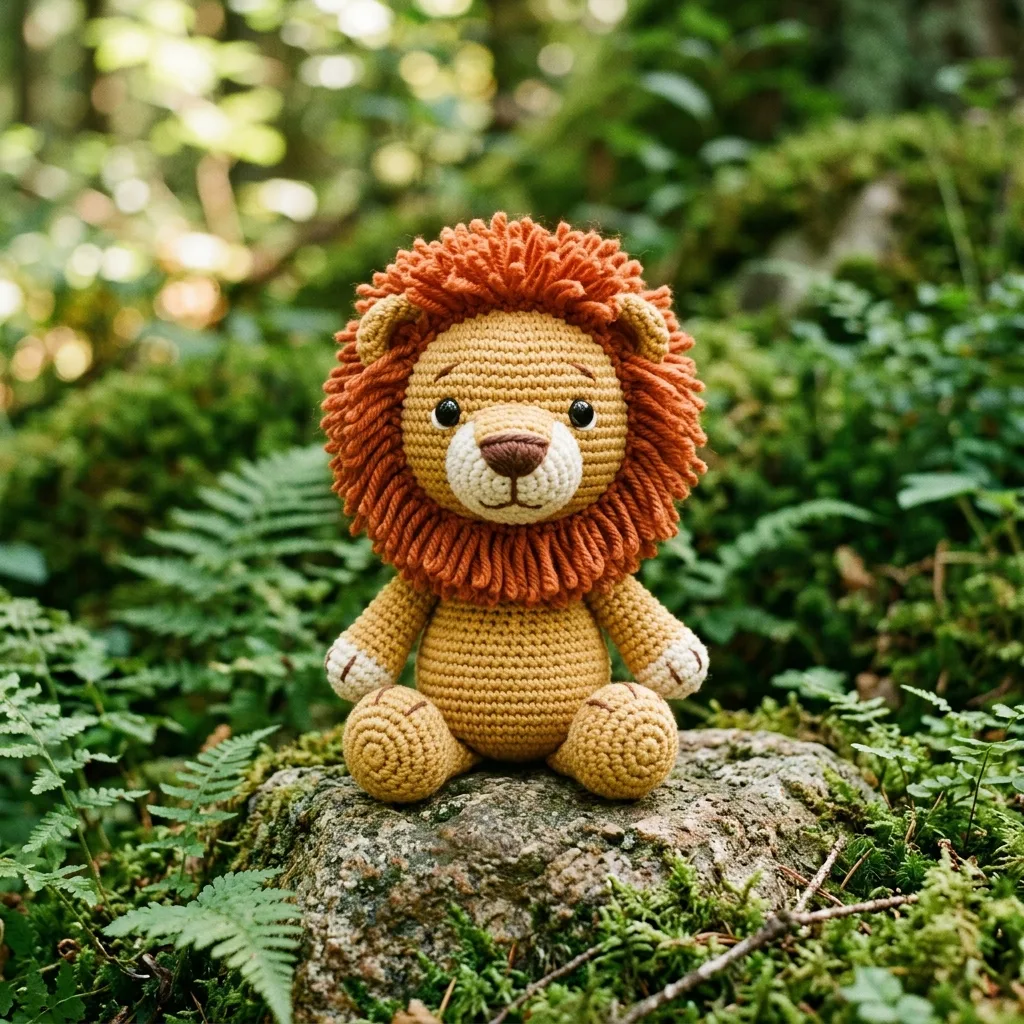
This cheerful amigurumi lion features a golden body worked in tight single crochet, a fluffy burnt orange loop-stitch mane, and sweet embroidered details. Standing approximately 7 inches tall, he is the perfect beginner-friendly project with professional-looking results. Here is the complete pattern to make your own.
Materials You Will Need
- Worsted weight yarn (4) in gold/mustard (100g), burnt orange (50g), cream (small amount), brown (small amount)
- 3.5mm crochet hook
- 9mm black safety eyes
- Fiberfill stuffing
- Yarn needle
- Stitch marker
Abbreviations
- MR: Magic ring
- sc: Single crochet
- inc: 2 sc in same stitch
- dec: Invisible decrease
- sl st: Slip stitch
- FLO: Front loop only
- BLO: Back loop only
Gauge and Finished Size
Gauge is not critical for amigurumi, but work tightly so stuffing does not show through. Finished lion measures approximately 7 inches tall and 4 inches wide.
Head (Gold)
Rnd 1: 6 sc in MR (6)
Rnd 2: Inc in each st (12)
Rnd 3: (sc, inc) x 6 (18)
Rnd 4: (2 sc, inc) x 6 (24)
Rnd 5: (3 sc, inc) x 6 (30)
Rnd 6: (4 sc, inc) x 6 (36)
Rnd 7: (5 sc, inc) x 6 (42)
Rnds 8 to 14: Sc in each st (42)
Rnd 15: (5 sc, dec) x 6 (36)
Rnd 16: (4 sc, dec) x 6 (30)
Insert safety eyes between rounds 10 and 11, approximately 8 stitches apart.
Rnd 17: (3 sc, dec) x 6 (24)
Rnd 18: (2 sc, dec) x 6 (18)
Stuff head firmly.
Rnd 19: (sc, dec) x 6 (12)
Rnd 20: Dec x 6 (6)
Fasten off and close hole.
Muzzle (Cream)
Rnd 1: 6 sc in MR (6)
Rnd 2: Inc in each st (12)
Rnd 3: (sc, inc) x 6 (18)
Rnds 4 to 5: Sc in each st (18)
Fasten off with long tail. Stuff lightly and sew to front of head between eyes and chin. Embroider brown triangle nose and mouth line using brown yarn.
Body (Gold)
Rnd 1: 6 sc in MR (6)
Rnd 2: Inc in each st (12)
Rnd 3: (sc, inc) x 6 (18)
Rnd 4: (2 sc, inc) x 6 (24)
Rnd 5: (3 sc, inc) x 6 (30)
Rnds 6 to 12: Sc in each st (30)
Rnd 13: (3 sc, dec) x 6 (24)
Rnds 14 to 15: Sc in each st (24)
Rnd 16: (2 sc, dec) x 6 (18)
Rnd 17: Sc in each st (18)
Stuff body firmly. Fasten off with long tail for sewing to head.
Arms (Gold, make 2)
Rnd 1: 6 sc in MR (6)
Rnd 2: Inc in each st (12)
Rnds 3 to 4: Sc in each st (12)
Rnd 5: (sc, dec) x 4 (8)
Rnds 6 to 12: Sc in each st (8)
Stuff hand portion lightly, leave arm mostly unstuffed for floppy effect. Flatten opening and sc closed. Embroider 3 small cream lines for paw pads using straight stitches.
Legs (Gold, make 2)
Rnd 1: 6 sc in MR (6)
Rnd 2: Inc in each st (12)
Rnd 3: (sc, inc) x 6 (18)
Rnds 4 to 5: Sc in each st (18)
Rnd 6: (sc, dec) x 6 (12)
Rnds 7 to 10: Sc in each st (12)
Stuff foot firmly, leg portion lightly. Flatten opening. Embroider cream paw pads. Add small brown lines between toes.
Ears (Gold, make 2)
Rnd 1: 6 sc in MR (6)
Rnd 2: Inc in each st (12)
Rnds 3 to 4: Sc in each st (12)
Fasten off with long tail. Do not stuff. Fold flat and sew to sides of head above eye level.
Mane (Burnt Orange)
The mane uses a loop stitch technique. Work directly onto the finished head.
Loop Stitch Method: Insert hook into stitch on head, wrap yarn around finger to create 1 inch loop, pull both strands through stitch, yarn over and pull through all loops on hook.
Starting at the top of the head behind the ears, work loop stitches in a circular pattern around the face. Cover approximately rounds 6 to 14 of the head, working in every stitch around the perimeter. Continue adding rows of loops until the mane appears full and fluffy as shown in the image.
Work additional loops under the chin to create the fuller beard effect visible in the featured lion.
Tail (Gold with Burnt Orange Tuft)
Rnd 1: 4 sc in MR (4)
Rnds 2 to 14: Sc in each st (4)
Fasten off. For the tuft, cut 8 to 10 pieces of burnt orange yarn, each 3 inches long. Fold in half and attach to tail end using a lark’s head knot. Trim to desired length.
Assembly
- Sew head to body with muzzle facing forward
- Attach arms to sides of body at round 15, angled slightly forward
- Sew legs to bottom front of body, positioned for sitting
- Attach tail to back center of body
- Weave in all ends
Tips for Success
- Use a smaller hook than yarn label suggests for tighter stitches
- Stuff firmly for a smooth, professional finish
- Place safety eyes before closing the head, as adjustments are easier
- For the loop stitch mane, work loosely and fluff loops with your fingers when complete
- Embroider facial details last, using the image as reference for placement
This cuddly lion makes an excellent gift or nursery decoration. The combination of simple single crochet body construction and the textured loop stitch mane creates visual interest without advanced techniques. Once you master this pattern, try experimenting with different mane colors or adding a bow tie for extra personality.
Related Articles
- How to Crochet Stunning Floral Statement Earrings Step by Step
- DIY Crochet Hair Bow Pattern: Elegant Lacework Accessory Tutorial
- Adorable Crochet Bunny Amigurumi & Matching Baby Rattle Set
- DIY Crochet Flower Necklace & Earrings Set with Pearl Centers
- DIY Crochet Jewelry Set: Matching Earrings, Necklace & Bracelet