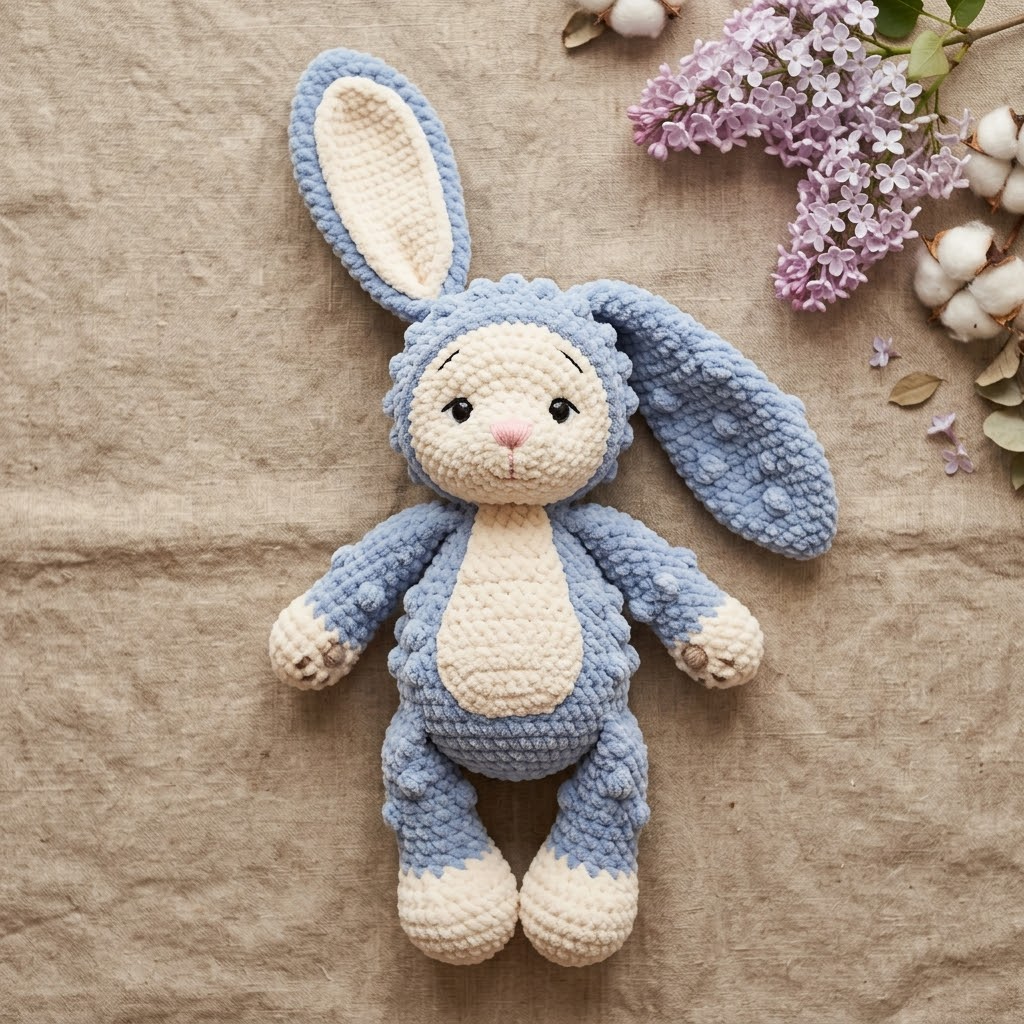
This soft, squishy bunny lovey stands approximately 14 inches tall and features that irresistible plush texture only chenille yarn can deliver. Made with periwinkle blue and cream velvet yarn, the bunny has adorable floppy ears, embroidered facial details, and a cuddly body perfect for little hands. Here is the complete pattern to make your own.
Materials Needed
- Plush chenille yarn (such as YarnArt Dolce or Himalaya Dolphin Baby) in periwinkle blue, approximately 150g
- Plush chenille yarn in cream, approximately 75g
- Small amount of pink yarn for nose embroidery
- Black yarn or embroidery floss for eyes and eyebrows
- 6mm crochet hook
- 9mm safety eyes
- Polyester fiberfill stuffing
- Yarn needle
- Stitch marker
Abbreviations
- ch = chain
- sc = single crochet
- inc = increase (2 sc in one stitch)
- dec = invisible decrease
- slst = slip stitch
- MR = magic ring
- FO = fasten off
Gauge and Finished Size
Gauge is not critical for amigurumi, but work tightly to prevent stuffing from showing. Finished bunny measures approximately 14 inches from ear tip to toe.
Pattern Instructions
Head (Cream)
Rnd 1: 6 sc in MR (6)
Rnd 2: inc in each st around (12)
Rnd 3: (sc 1, inc) x 6 (18)
Rnd 4: (sc 2, inc) x 6 (24)
Rnd 5: (sc 3, inc) x 6 (30)
Rnd 6: (sc 4, inc) x 6 (36)
Rnds 7 to 12: sc in each st around (36)
Rnd 13: (sc 4, dec) x 6 (30)
Rnd 14: (sc 3, dec) x 6 (24)
Insert safety eyes between rounds 9 and 10, approximately 6 stitches apart. Stuff head firmly.
Rnd 15: (sc 2, dec) x 6 (18)
Rnd 16: (sc 1, dec) x 6 (12)
Rnd 17: dec x 6 (6)
FO, leaving a long tail. Close hole and weave in end.
Muzzle (Cream)
Rnd 1: 6 sc in MR (6)
Rnd 2: inc in each st around (12)
Rnd 3: (sc 1, inc) x 6 (18)
Rnds 4 to 5: sc in each st around (18)
FO, leaving tail for sewing. Stuff lightly and sew to lower front of head. Embroider pink nose and black mouth.
Ears (Make 2)
Outer Ear (Blue)
Rnd 1: 6 sc in MR (6)
Rnd 2: inc in each st around (12)
Rnd 3: (sc 1, inc) x 6 (18)
Rnds 4 to 18: sc in each st around (18)
Rnd 19: (sc 1, dec) x 6 (12)
FO, leaving long tail.
Inner Ear (Cream)
Rnd 1: 6 sc in MR (6)
Rnd 2: (sc 1, inc) x 3 (9)
Rnd 3: (sc 2, inc) x 3 (12)
Rnds 4 to 16: sc in each st around (12)
FO, leaving tail. Do not stuff inner ear. Insert inner ear into outer ear and sew together at base. Attach ears to top of head, allowing them to flop naturally.
Body (Blue with Cream Belly Panel)
Rnd 1: 6 sc in MR with blue (6)
Rnd 2: inc in each st around (12)
Rnd 3: (sc 1, inc) x 6 (18)
Rnd 4: (sc 2, inc) x 6 (24)
Rnd 5: (sc 3, inc) x 6 (30)
Rnds 6 to 14: sc in each st around (30)
Rnd 15: (sc 3, dec) x 6 (24)
Rnd 16: (sc 2, dec) x 6 (18)
Stuff body firmly.
Rnd 17: (sc 1, dec) x 6 (12)
FO, leaving long tail for sewing to head.
Belly Panel (Cream)
Row 1: ch 6, sc in 2nd ch from hook, sc 4, ch 1, turn (5)
Rows 2 to 3: sc 5, ch 1, turn (5)
Row 4: inc, sc 3, inc, ch 1, turn (7)
Rows 5 to 10: sc 7, ch 1, turn (7)
Row 11: dec, sc 3, dec, ch 1, turn (5)
Rows 12 to 13: sc 5 (5)
FO. Sew belly panel to front of body before attaching head.
Arms (Make 2)
Hands (Cream)
Rnd 1: 6 sc in MR (6)
Rnd 2: inc in each st around (12)
Rnds 3 to 5: sc in each st around (12)
Change to blue.
Rnds 6 to 14: sc in each st around (12)
Rnd 15: (sc 1, dec) x 4 (8)
Stuff lightly. FO, leaving tail for sewing.
Legs (Make 2)
Feet (Cream)
Rnd 1: 6 sc in MR (6)
Rnd 2: inc in each st around (12)
Rnd 3: (sc 1, inc) x 6 (18)
Rnds 4 to 6: sc in each st around (18)
Rnd 7: (sc 1, dec) x 6 (12)
Change to blue.
Rnds 8 to 16: sc in each st around (12)
Stuff legs. FO, leaving tail for sewing.
Assembly
- Sew the belly panel to the body front
- Attach head to body securely
- Sew arms to sides of body at round 14
- Attach legs to bottom of body
- Position and sew ears to top of head, angling slightly outward
- Embroider eyebrows using black yarn with small curved stitches above each eye
Tips for Working with Chenille Yarn
Chenille yarn hides stitches easily. Use a stitch marker religiously and count every round. Work in good lighting. If you make a mistake, do not try to frog more than a few stitches because the yarn tangles and sheds. Use a slightly smaller hook than recommended for a tighter fabric.
This bunny makes a perfect baby gift or nursery decoration. The plush texture is incredibly soft and the floppy ears give it that huggable quality children love. Make one in pastel pink, mint green, or classic white for different looks using the same pattern.
Related Articles
- Stunning Crochet Rose Bracelets: Free Pattern for Floral Jewelry
- DIY Crochet Jewelry Set: Matching Earrings, Necklace & Bracelet
- Adorable Crochet Ladybug Baby Bonnet Pattern for Beginners
- Adorable Monster Hooded Baby Sweater Crochet Pattern Guide
- Adorable Rainbow Amigurumi Bunny Pattern for Beginners