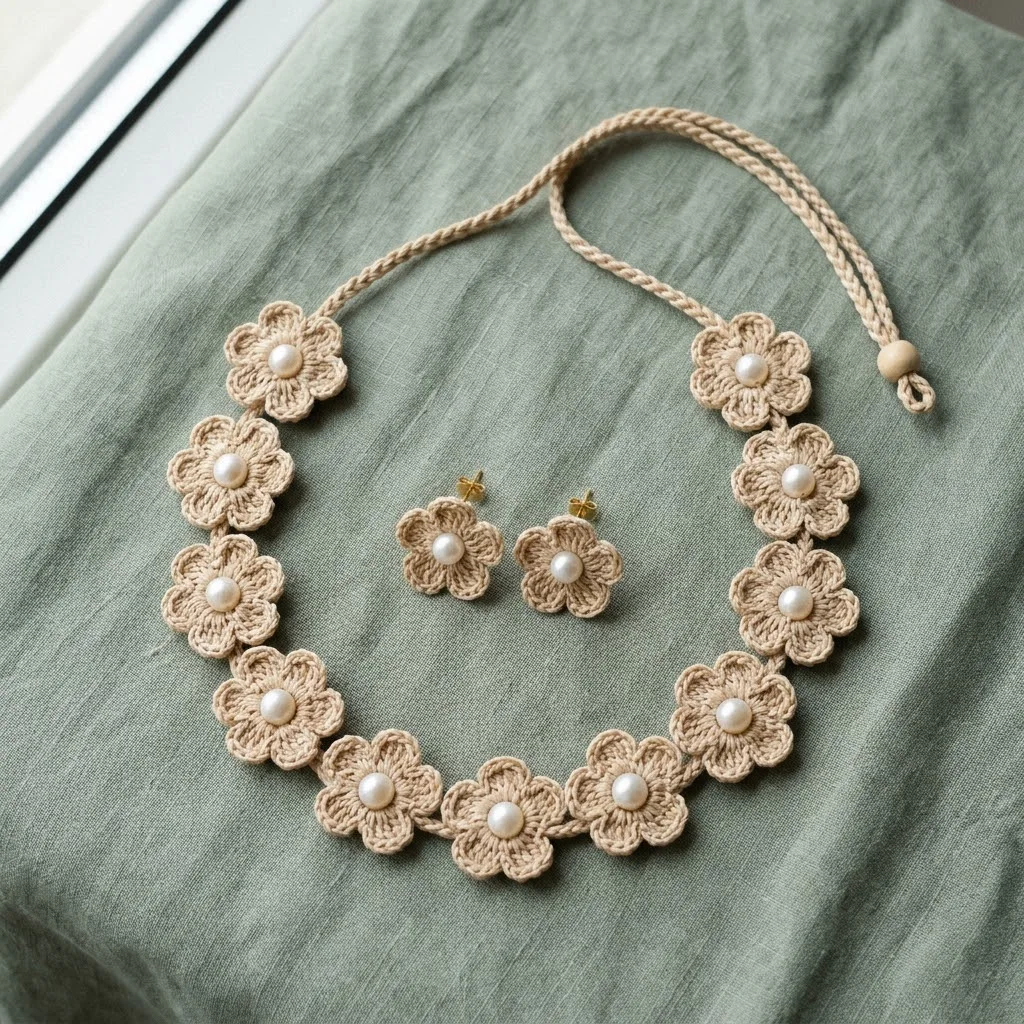
This delicate crochet flower jewelry set features 12 connected six-petal flowers in natural cream cotton thread, each centered with a lustrous pearl bead. The necklace uses a twisted cord tie closure with a wooden bead accent, and the matching stud earrings complete the look. Here is the complete pattern to make your own.
Materials
- Size 10 crochet cotton thread in cream or ecru, approximately 50 yards
- Steel crochet hook, size 7 (1.65mm)
- 14 pearl beads, 6mm diameter (12 for necklace, 2 for earrings)
- 1 small wooden bead for closure, 8mm
- 2 stud earring posts with flat pad backs
- Jewelry glue
- Tapestry needle
- Scissors
Abbreviations
- ch: chain
- sl st: slip stitch
- sc: single crochet
- hdc: half double crochet
- dc: double crochet
Gauge
One completed flower measures approximately 1 inch (2.5cm) in diameter. Gauge is not critical for jewelry, but consistent tension ensures uniform flowers.
Finished Measurements
- Necklace length: adjustable, approximately 16 to 20 inches with tie closure
- Each flower: 1 inch diameter
- Earrings: 1 inch diameter each
Pattern Instructions
Six-Petal Flower (Make 14 Total)
Make 12 flowers for the necklace and 2 for the earrings.
Magic ring method:
Round 1: Create a magic ring. Ch 1, work 12 sc into the ring. Pull ring closed tightly. Sl st to first sc to join. (12 sc)
Round 2 (Petals): Ch 3, dc in same stitch, dc in next stitch, ch 3, sl st in same stitch as second dc. Repeat from to five more times. You will create 6 petals total, using 2 stitches per petal. Sl st to base of first petal to join. Fasten off.
Finishing each flower:
Weave in the starting tail through the center back. Thread the ending tail onto your tapestry needle and weave through the back of several stitches to secure. Trim excess thread close to the work.
Attaching Pearl Centers
Thread a 6-inch length of matching thread onto your tapestry needle. From the back of the flower, bring the needle up through the center hole. String one 6mm pearl bead onto the thread. Insert the needle back down through the center, pulling snug so the pearl sits flat against the flower center. Tie off securely on the back with a small knot. Apply a tiny dot of jewelry glue to the knot for extra security. Repeat for all 14 flowers.
Necklace Assembly
Creating the twisted cord tie:
Cut three strands of crochet thread, each 60 inches long. Knot all three strands together at one end and secure that end (tape it to a table or use a clipboard). Twist all three strands together tightly in the same direction until the cord wants to kink. Fold the twisted length in half, holding the center point. Release carefully and let the cord twist back on itself. Knot both ends to secure. Trim to approximately 24 inches total length.
Alternatively, you can crochet a simple chain cord. Ch 100, fasten off. This creates a flat cord approximately 12 inches long. Make two of these if you prefer a longer adjustable tie.
Joining the flowers:
Lay out your 12 flowers in a row. Using matching thread and your tapestry needle, join flowers by stitching through the edge of two adjacent petals where they meet. Take 3 to 4 small stitches through both petal edges, then knot securely on the back.
Work across, connecting all 12 flowers in a curved line. The flowers should overlap slightly at the petal edges, creating the continuous garland effect visible in the finished piece.
Attaching the cord:
Find the center point of your twisted cord. Attach each end of the cord to the back of the end flowers. Stitch securely through the cord and the flower back several times. The cord should extend equally on both sides.
Adding the closure bead:
On one cord end, thread the wooden bead and tie a knot below it to secure. On the opposite end, create a small loop by folding the cord back on itself and stitching it closed. The loop should be just large enough for the wooden bead to pass through. This creates your adjustable closure.
Earrings Assembly
Take your two remaining pearl-centered flowers. Apply a generous dot of jewelry glue to the flat pad of each earring post. Press the post firmly onto the center back of each flower, positioning it so the flower sits straight when worn. Allow glue to cure fully according to package directions, typically 24 hours. For extra durability, you can also stitch around the post base with matching thread before gluing.
Tips for Best Results
Thread tension matters. Work with firm, even tension so your petals hold their shape. Loose stitches create floppy flowers that will not look crisp.
Block if needed. Pin each flower flat on a blocking board and lightly steam or spray with starch. This helps the petals lie flat and uniform.
Choose quality pearls. Glass pearls work well and are affordable. Freshwater pearls add elegance for special occasions. Avoid plastic pearls, which look cheap.
Test your glue. Some jewelry glues yellow over time. Use a clear-drying formula rated for fabric and metal.
Color variations. This pattern works beautifully in white for bridal jewelry, soft pink for spring, or variegated thread for a bohemian look. Gold or colored beads can replace pearls for different aesthetics.
Wearing and Care
Store your set flat to prevent crushing the petals. Spot clean gently with a damp cloth if needed. Avoid submerging in water, as this can loosen the glued components.
This lightweight jewelry set pairs perfectly with linen dresses, simple blouses, or summer wedding attire. The natural cream thread and soft pearl sheen give it a timeless, handcrafted quality that works for everyday wear or special occasions. Make a set for yourself, then make another as a gift. Once you master the simple flower motif, you will find endless ways to use it.