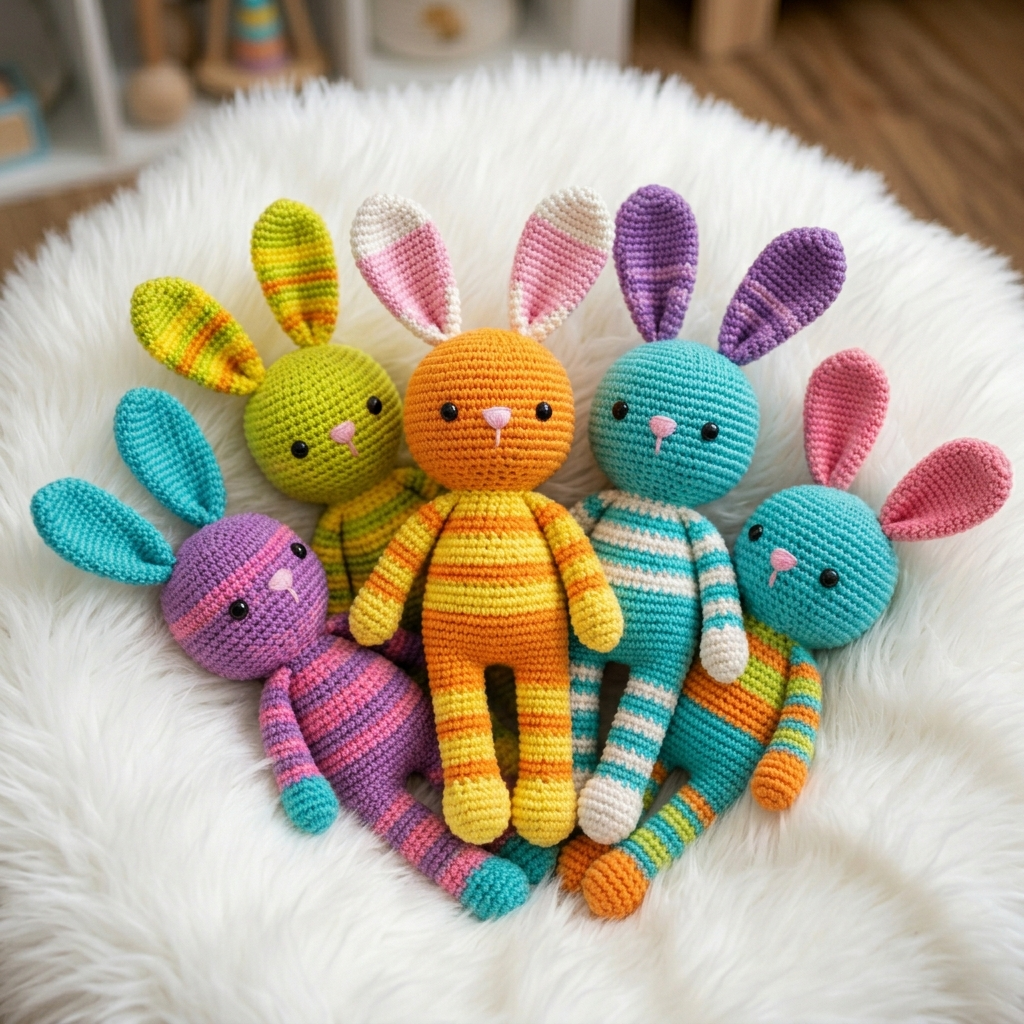
These cheerful striped amigurumi bunnies feature vibrant rainbow colorways, simple single crochet construction, and a beginner-friendly design that works up in just a few hours. Below is the complete pattern to make your own cuddly bunny with those adorable floppy ears and striped body.
What You’ll Make
Looking at these bunnies, you’ll notice they stand approximately 10 to 12 inches tall with elongated bodies, chunky heads, and signature long ears with contrasting inner colors. The construction uses continuous rounds of single crochet throughout, with color changes creating those playful stripes. Safety eyes and embroidered noses give each bunny personality.
Materials
- Worsted weight cotton yarn (approximately 150 yards total)
- Main color: 80 yards
- Contrast colors for stripes: 50 yards total (3 to 4 colors)
- Ear inner color: 20 yards
- 3.5mm (E/4) crochet hook
- 9mm safety eyes
- Polyester fiberfill stuffing
- Yarn needle
- Stitch marker
- Pink yarn or embroidery floss for nose
Abbreviations
- MR = magic ring
- sc = single crochet
- inc = increase (2 sc in one stitch)
- dec = invisible decrease
- st(s) = stitch(es)
- rnd = round
Gauge and Finished Size
Gauge: 5 sc = 1 inch. Work tightly to prevent stuffing from showing.
Finished bunny: approximately 11 inches tall, 3.5 inches wide at body.
Pattern Instructions
Head
Work in continuous rounds. Use stitch marker to track rounds.
Rnd 1: 6 sc in MR (6)
Rnd 2: inc in each st (12)
Rnd 3: (sc 1, inc) 6 times (18)
Rnd 4: (sc 2, inc) 6 times (24)
Rnd 5: (sc 3, inc) 6 times (30)
Rnd 6: (sc 4, inc) 6 times (36)
Rnds 7 to 14: sc in each st (36)
Rnd 15: (sc 4, dec) 6 times (30)
Rnd 16: (sc 3, dec) 6 times (24)
Insert safety eyes between rounds 10 and 11, approximately 8 stitches apart. Stuff head firmly.
Rnd 17: (sc 2, dec) 6 times (18)
Rnd 18: (sc 1, dec) 6 times (12)
Continue stuffing as you close.
Rnd 19: dec 6 times (6)
Fasten off. Sew closed with yarn needle.
Body
Change colors every 2 to 3 rounds for stripe effect as shown in the image.
Rnd 1: 6 sc in MR (6)
Rnd 2: inc in each st (12)
Rnd 3: (sc 1, inc) 6 times (18)
Rnd 4: (sc 2, inc) 6 times (24)
Rnds 5 to 8: sc in each st (24)
Rnd 9: (sc 2, dec) 6 times (18)
Rnds 10 to 16: sc in each st (18)
Rnd 17: (sc 1, dec) 6 times (12)
Stuff body firmly. Fasten off, leaving long tail for sewing to head.
Arms (Make 2)
Use main body color or continue stripe pattern.
Rnd 1: 6 sc in MR (6)
Rnd 2: inc in each st (12)
Rnds 3 to 12: sc in each st (12)
Stuff lightly. Flatten opening and sc closed through both layers. Fasten off, leaving tail for sewing.
Legs (Make 2)
Rnd 1: 6 sc in MR (6)
Rnd 2: inc in each st (12)
Rnd 3: (sc 1, inc) 6 times (18)
Rnds 4 to 6: sc in each st (18)
Rnd 7: (sc 1, dec) 6 times (12)
Rnds 8 to 14: sc in each st (12)
Stuff firmly. Flatten and close. Fasten off with long tail.
Ears (Make 2)
Outer Ear (main color):
Rnd 1: 6 sc in MR (6)
Rnd 2: (sc 1, inc) 3 times (9)
Rnd 3: (sc 2, inc) 3 times (12)
Rnds 4 to 18: sc in each st (12)
Do not stuff. Flatten and set aside.
Inner Ear (contrast color):
Rnd 1: 5 sc in MR (5)
Rnd 2: (sc 1, inc) twice, sc 1 (7)
Rnd 3: sc in each st (7)
Rnds 4 to 14: sc in each st (7)
Fasten off. Sew inner ear to outer ear before attaching to head.
Assembly
- Sew head to body using whip stitch, adding extra stuffing at neck if needed.
- Position arms at round 2 of body, angled slightly forward. Sew securely.
- Attach legs to bottom of body, ensuring bunny sits upright.
- Sew assembled ears to top of head, approximately 4 stitches apart, with inner ear facing forward.
- Embroider nose using pink yarn. Create a small triangle with 3 to 4 satin stitches between and slightly below the eyes.
Color Combination Ideas
Based on the bunnies shown, try these palettes:
- Sunset: Orange, yellow, golden yellow stripes with pink inner ears
- Ocean: Teal body with coral, cream, and orange stripes
- Spring: Lime green with rainbow striped ears
- Berry: Purple and pink stripes with teal accents
Beginner Tips
Tight tension matters. Loose stitches let stuffing peek through. If you see white fiberfill, size down your hook.
Invisible decrease technique: Insert hook through front loops only of the next two stitches, yarn over, pull through both, yarn over, complete the stitch. This prevents holes at decrease points.
Color changes: To avoid jog lines, change yarn color on the last pull-through of the stitch before the color change round.
Stuffing: Fill the head firmly for a rounded shape. Keep limbs lighter so they drape naturally.
Safety eyes: Always secure eyes before closing the head. Tug firmly to test before giving to children.
Make It Your Own
These rainbow bunnies are perfect for using up scrap yarn. Each one in the image shows a different stripe pattern, proving there is no wrong way to combine colors. Experiment with variegated yarn for automatic stripes, or keep it simple with a solid body and striped ears only.
Grab your hook and some bright yarn, and stitch up a whole rainbow family of these huggable bunnies.
Related Articles
- Adorable Crochet Lion Amigurumi Pattern for Beginners & Beyond
- DIY Crochet Hair Bow Pattern: Elegant Lacework Accessory Tutorial
- DIY Crochet Flower Necklace & Earrings Set with Pearl Centers
- Adorable Monster Hooded Baby Sweater Crochet Pattern Guide
- Adorable Granny Square Tutu Dress: Free Crochet Pattern for Girls